Friday, April 6, 2018

Take a stitch Tuesday or a stitch a day


Last year I came across the Pintangle blog by Sharon B. Now I'm not a Pintangler or one who does Pintangle but I do like the idea of it and the finished look. This isn't what drew me to Sharon's blog.  TAST is what caught my eye. What is TAST you may be asking yourself and I'll tell ya what it is and what I think it is. TAST is basically Take A Stitch Tuesday and it's a hand embroidery challenge that started way back in 2007. That's a lot of years of stitching. The idea of the challenge is to work as many of the proposed stitches as you can or want. Each stitch is announced on Tuesday mornings. Imagine that! LOL. Now you know where the name came from.

I found this challenge partway through last year but decided not to join at the time. I've thought about it every once in a bit but never really thought too hard. A new year and challenge started this January but it wasn't on my radar at the time. I've been drawn to hand work again so this challenge resurfaced in my mind. Even though it started like 14 weekly stitches ago I don't mind. It looks like they are only on stitch 10 so that's even better.  It's only a stitch a week and I'm sure I can catch up. The challenge will be to keep motivated for the rest of the year. Now that's the real challenge.


This is what I plan on working my stitches on. I bought this embroidery hoop from a thrift store I'm pretty sure and I've held onto it for several years. I believe this one is a quilting hoop but it will work fine for this project. I am using some of my ugly to me fabric for my base. I've actually got two layers of the fabric hooped up. They way I see it the fabric won't matter because I plan on covering the whole thing in stitches. I did sketch out the word LOVE for the center. I thought that might be a nice word to work around.


I also came across One Year of Stitches and Buttons over on lil blue boo and I plan on working on this one at the same time as the TAST challenge. This challenge seems more freeform. I need to read a bit more but I believe this one is just to add a button and stitch a day but I don't think there is a specific stitch. It's mostly just do what you want and what fits your hoop and project.


This time I am using an oval frame with the word BELIEVE. I'm still using the same farmhouse blue fabric doubled as my base. I have plenty of embroidery floss, buttons, and beads to keep me stitching for most of the year at least. What a fun way to use up more of my stash and to do something that I enjoy.

Do you have any year long crazy to most people projects you are working on this year?


Tuesday, March 27, 2018

TTMT #36 Is it a basket or a hat?


Laura-Lynn from the Mom & Pop Quilt Shop  on YouTube showed us how to make these fabric bowls for her weekend project. It looked like fun so I decide to give it a try. There's a similar sew along going on over on Instagram. There's a rug pattern that uses a jellyroll and basically the same process. I'm sure it would be a non working rug because I can't see that it would last very long if people walked on it. It's like walking on a quilt.


You can watch the video for all the details but basically you take strips of fabric and strips of batting and sew them together. Then you sew them into a basket like those fabric covered rope bowls that come in and out of popularity.


I used about 3/4 of my fabric strips and made this bowl. You can see me modeling it in my video ;)


I used the rest to make a long oval basket. Since there is only batting and fabric the sides are obviously going to be floppy but I just wanted to see what it would look like. As a larger basket it is amazing. I love the soft floppy sides but if you need to have something with some structure then you would be better off making the rope version. I would like to find something in between the two because I have a fun idea that I would like to try. Maybe some type of cording. I'll have to wander around Jo-Ann's and see what I can find.


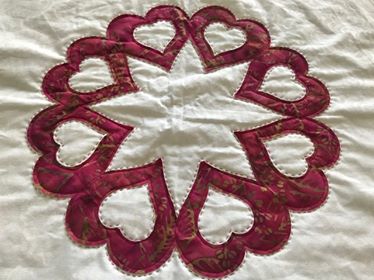
Here's a close up of my Hearts a Flutter wall hanging that I am working on. These are the beautiful hearts from Barb. I love practicing my stitches on this wall hanging.


Miss Mocha likes to help.


My red, white, and blue hexies are ready for the next step.


43 more crumb blocks added to the pile.


Now I have 133 crumb blocks. I like to trim them to 6.5". These will be fun to play with.


Here's a pic of some of the ones I made this past week.


Friday, March 23, 2018

Sew With Me Stocking Blocks Version #2


This week I have another stocking quilt block design for you. This block was used as part of a private swap on Quilting Around the World in 2015. I haven't been able to find an online version but if you know where it is from please leave a comment so I can properly link to the design. Thanks!


Stocking cutting sizes:

A.   5.5" x 8.5"
B.   1.5" x 4.5"
 C.  1.5" x 12.5"
                         D.  1.75" squares (3 per block)
E.  2.5" x 6.5"
 F.  4.5" x 10.5"

You will draw a diagonal line corner to corner down the center of all D squares.  I recommend waiting to cut piece C until the rest of the block is pieced and pressed. Or, cut a strip the width of fabric by 1.5" wide and sew to the block and trim excess then use left over length to add to the next block.


For those that like my crazy sketches here you go. I did like cutting out my pieces and laying them on the almost exact sized paper version. It kept all the little pieces in order. I really need to make some mini design boards.